This article is about how to keep member engaged after you record a webinar, using the Content Management, Page Builder, and Menu tools in the admin website. Recording the webinar is only the first half of the work; this article walks through a three-step process for getting that recording into the portal and building supporting content around it.
Note: This article assumes you already have a recording file ready to upload. For general descriptions of the tools referenced here, see the linked articles in each step.
Step 1: Upload the Webinar Recording
The recording is uploaded to the portal as custom content by going to the content section (1), clicking on New Content (2), and clicking on Video (3).
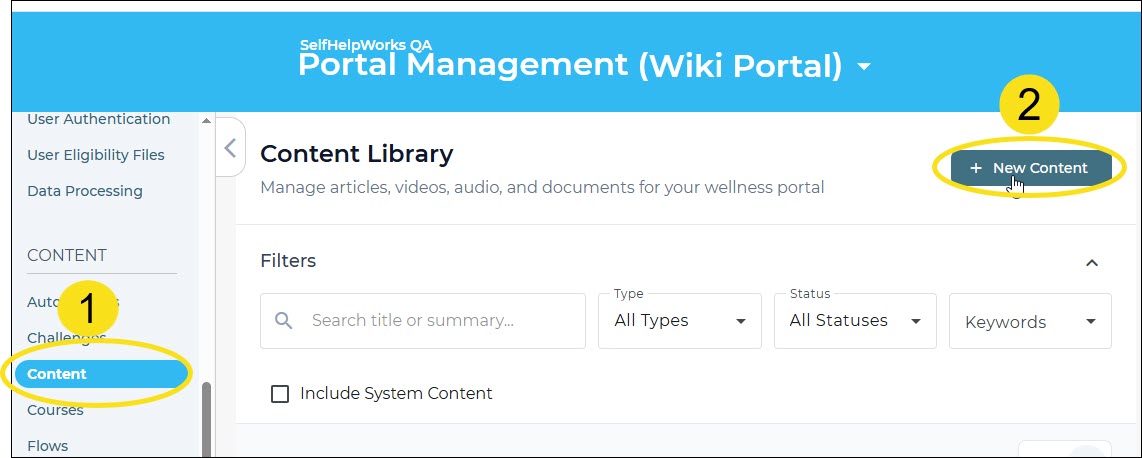
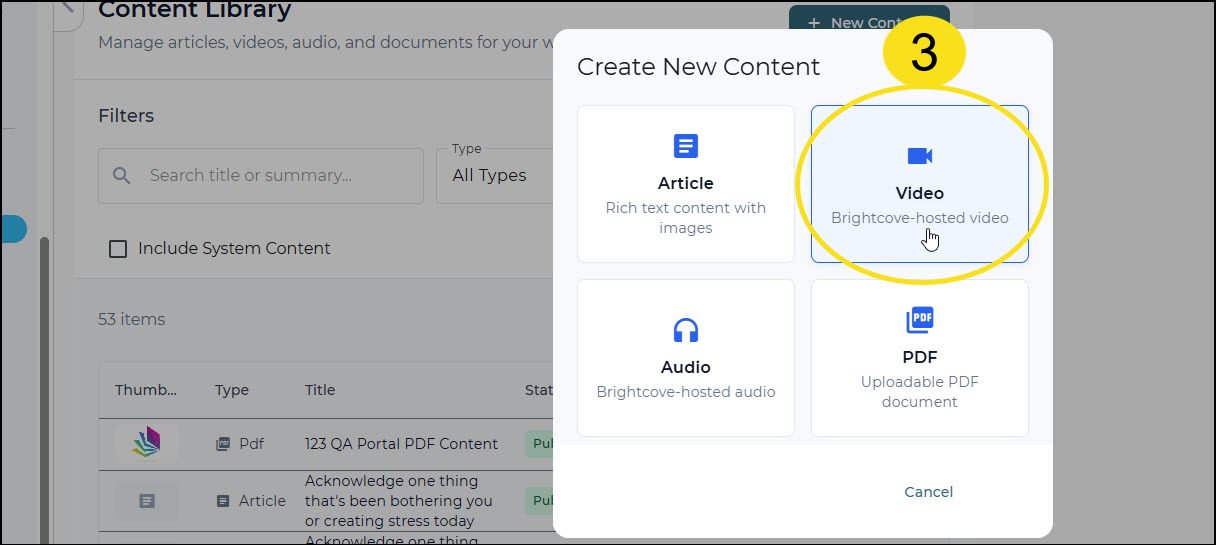
For more details on uploading content, see this article on using the Content Management Tool.
Step 2: Create a Custom Page
Next, build a custom page to house the recording: Click on Page Builder (1), click on CREATE (2), click on the Blank Member Page tile (3), and click CREATE (4).
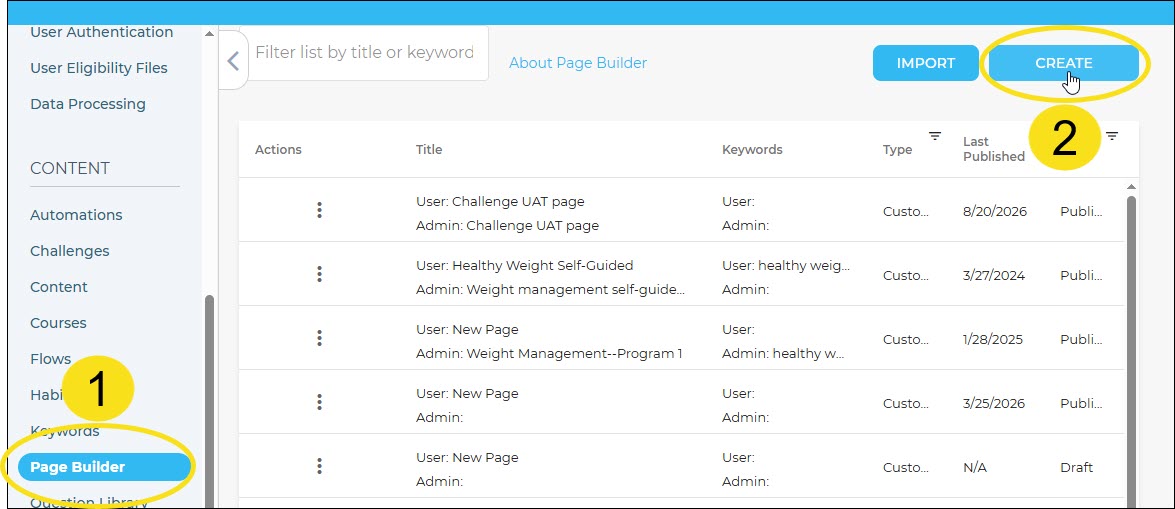
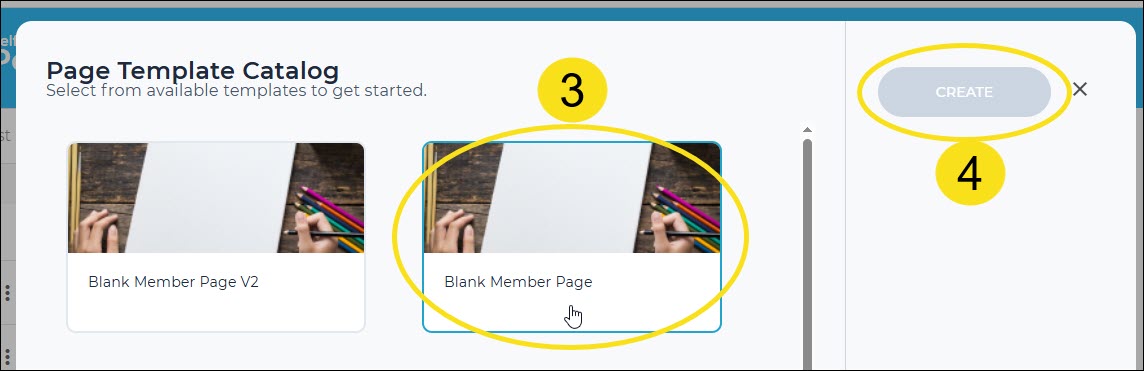
On the new page creation editor, add a content component and choose the webinar from your list. For more details on pages, see this article on creating a new page in the Page Builder.
A custom page can hold much more than the recording alone. Alongside the video, consider adding any or all of the following:
- any platform content that expands on the topics you covered in the webinar;
- related Avidon courses, habit builders, and challenges; and
- a custom flow that acts as a knowledge-check survey. To build one, see this article on creating and managing flows.
Step 3: Update the Menu
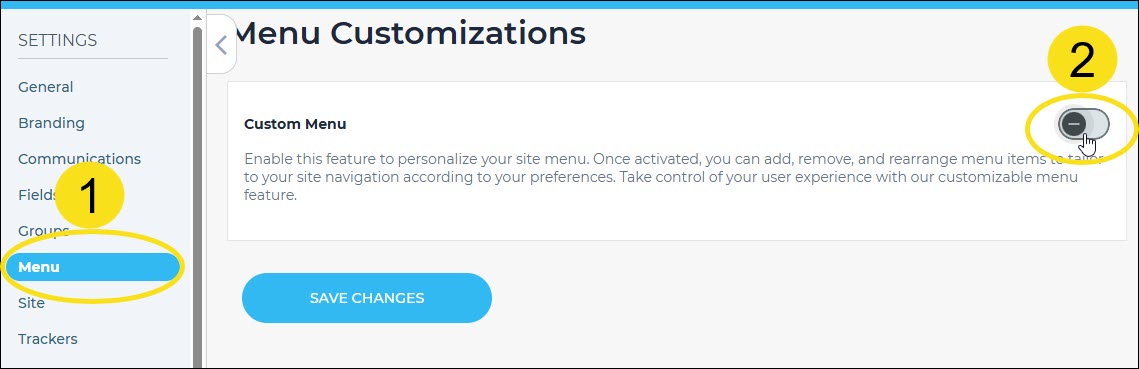
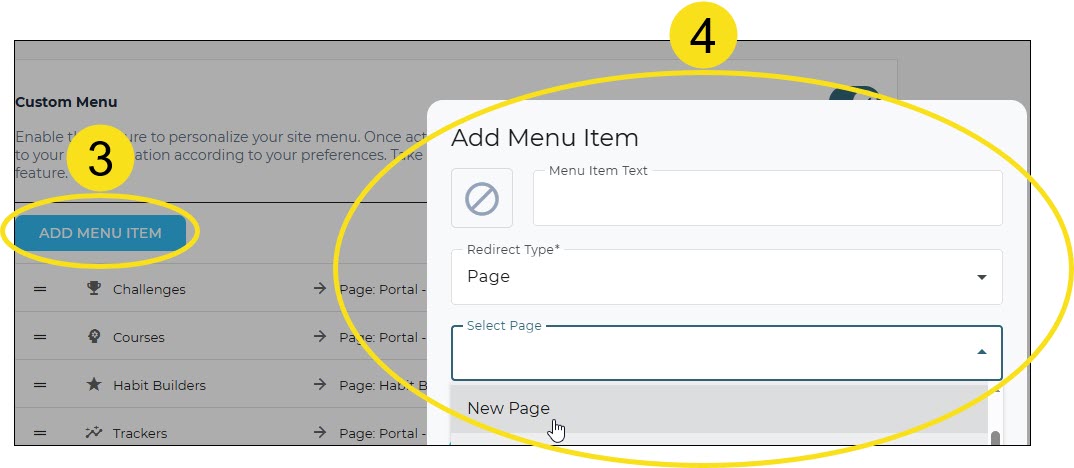
Finally, add the custom page to the member dashboard menu so members can find it. Go to Menu in the Settings section (1), click the toggle to enable it (2), click ADD MENU ITEM (3), and add the new page to the menu (4).
For more details, see this article on creating a custom portal menu.
Once the custom page is added as a tab, members will have a permanent place to go to review the webinar recoding and any supporting content you placed on the page.
Bonus Tip: Managing Multiple Webinars
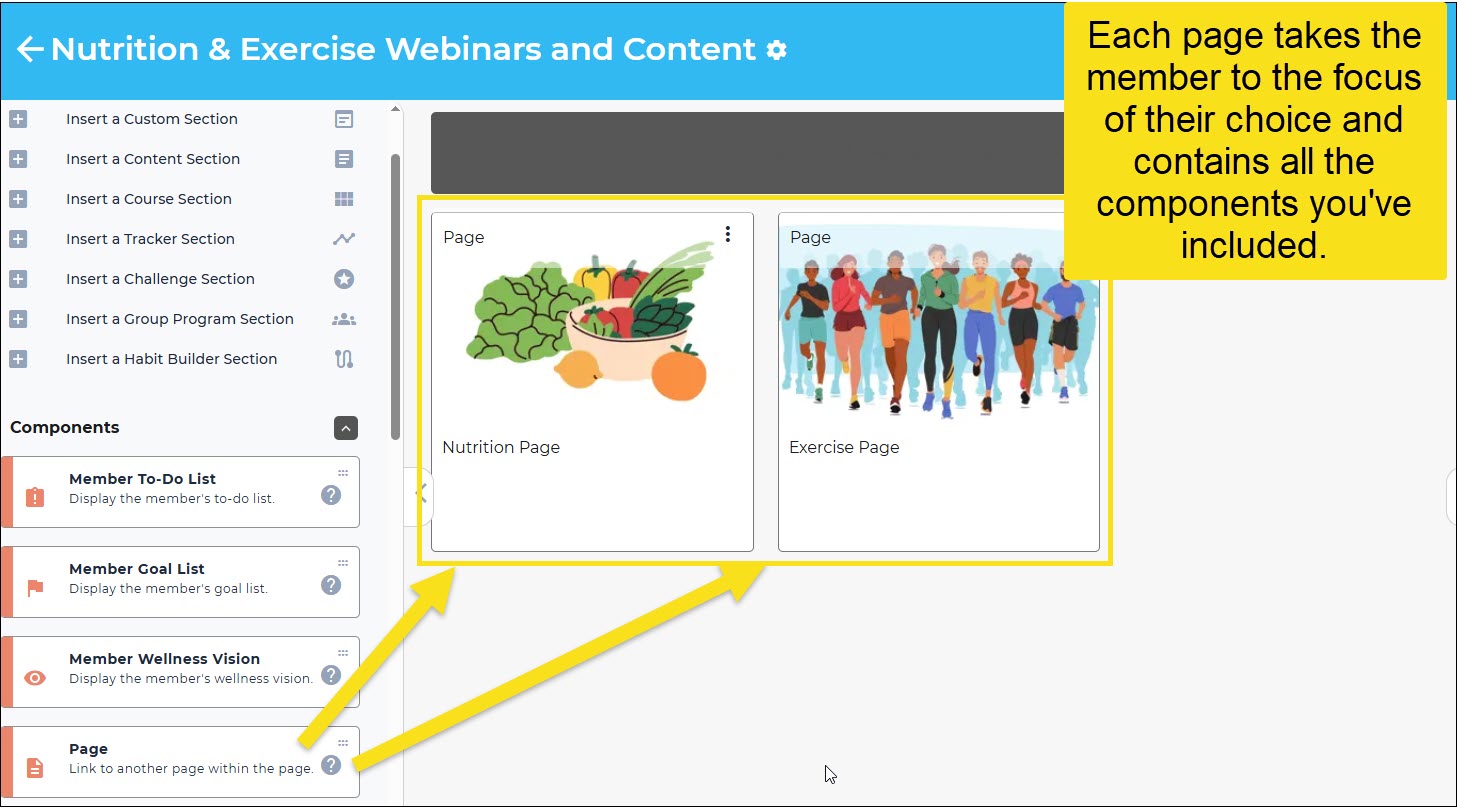
If you have more than one webinar to house, the same approach scales. Create a custom page for each webinar, then create one additional page with a Page tile that routes to each of those webinar pages.
For example...
Let's say you have created two pages:
- A nutrition page that has a webinar, nutrition content, and a nutrition challenge
- An exercise page that has a webinar, exercise course, related exercise content, and an exercise challenge.
You could create one parent page that has a tile for each of these sub-pages that routes the member to the focus of their choice. Here is what it would look like in the Page Builder:
Was this article helpful?
That’s Great!
Thank you for your feedback
Sorry! We couldn't be helpful
Thank you for your feedback
Feedback sent
We appreciate your effort and will try to fix the article